Most water damage claim disputes are not caused by bad intent; they are caused by incomplete documentation and delayed mitigation. If you create a complete evidence package from day one, you give your adjuster a faster path to verify scope and approve necessary work.
If your property is actively wet, start mitigation first: Water Damage Restoration in San Marcos.
1) Event Timeline (Create This Immediately)
Document:
- Date and time damage was discovered.
- Likely source (burst pipe, overflow, roof intrusion, appliance line failure).
- Time source was stopped.
- Time mitigation began.
Simple timeline consistency is one of the strongest claim accelerators.
2) Photo + Video Evidence Set
Capture both wide and close views of:
- Affected rooms
- Water lines and visible migration
- Damaged materials (drywall, flooring, cabinets)
- Personal property impacts
- Potential source areas
Keep original files with timestamps where possible.
3) Room-by-Room Scope Notes
Create a short checklist for each room:
- Materials affected
- Approximate area impacted
- Visible signs (staining, swelling, delamination)
- Odor or contamination indicators
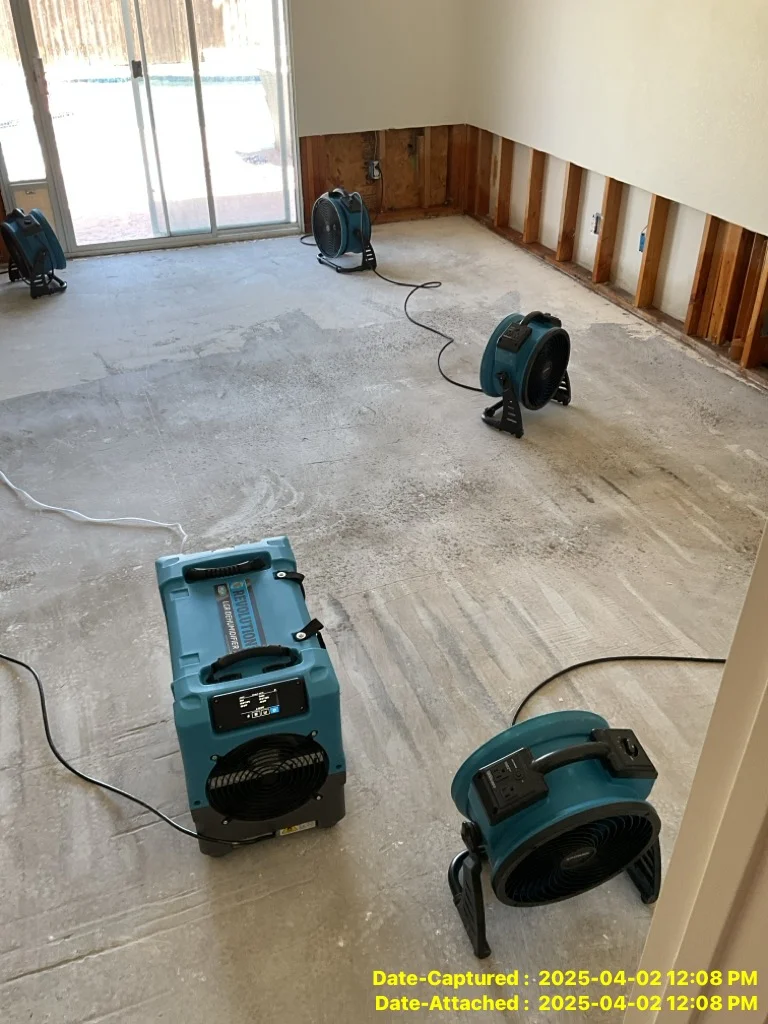
4) Mitigation Log (Critical for Coverage)
Track what was done to prevent additional damage:
- Water shutoff actions
- Temporary containment steps
- Extraction start
- Equipment setup and monitoring dates
This supports your duty to mitigate under many policies.
5) Contents Inventory
List damaged items by room with:
- Description
- Quantity
- Estimated value
- Photo references
Do not discard items before documentation unless required for safety.
6) Communication Log
Maintain a simple claim communication journal:
- Claim number
- Adjuster name/contact
- Date/time of calls and emails
- Decisions, approvals, and next steps
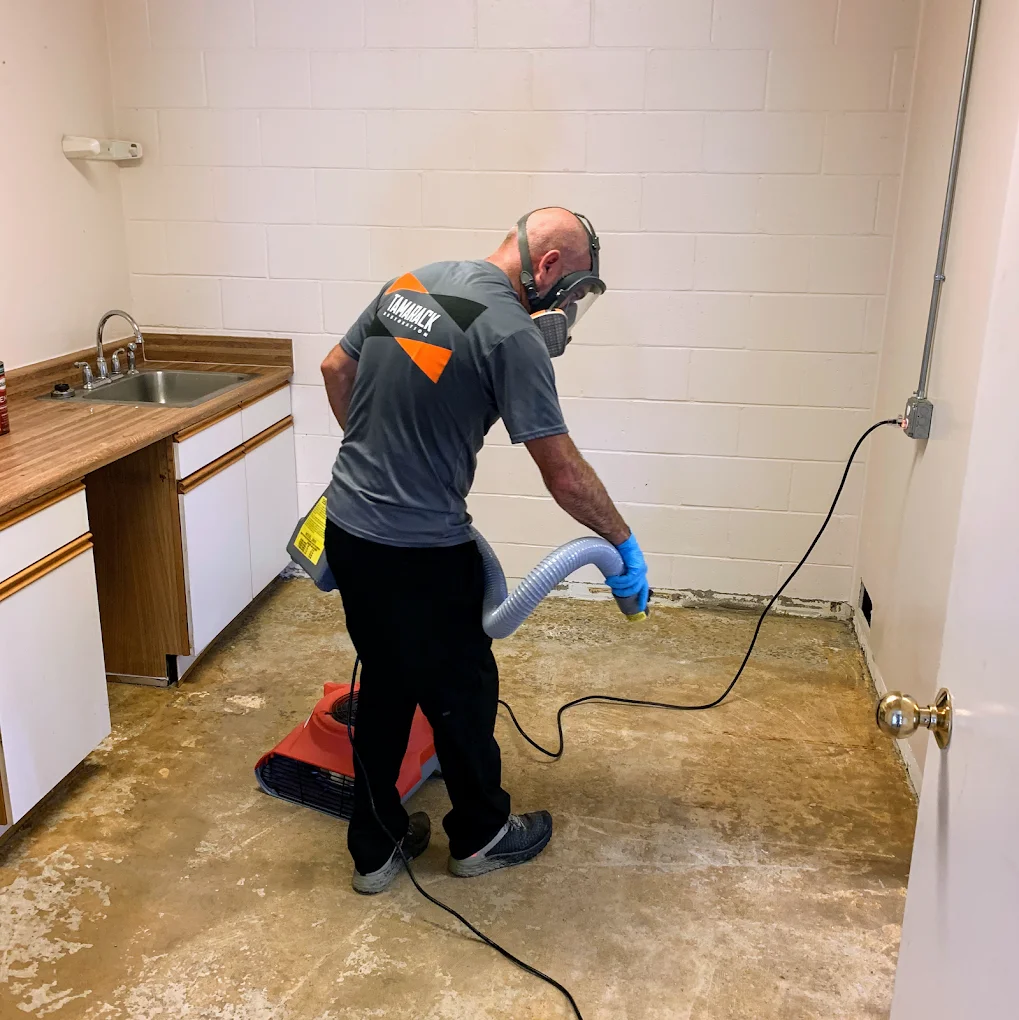
7) Professional Reports to Include
Where available, include:
- Moisture maps/readings
- Drying logs
- Scope summaries
- Photographic progress sets
These records improve clarity around necessary work and completion milestones.
Service Pages to Support Fast Recovery
Nearby money pages:
- Water Damage Restoration in Vista
- Water Damage Restoration in Carlsbad
- Water Damage Restoration in Oceanside
Coverage reference: Does Homeowners Insurance Cover Water Damage?.
Final Takeaway
A good claim file is organized, timestamped, and evidence-based. Pair fast mitigation with clean documentation and you dramatically improve both claim speed and restoration outcomes.
Claim Quality Control Checklist
Before submitting final claim documentation, verify that you have:
- Source-cause narrative
- Before/after mitigation photos
- Room-by-room material scope
- Moisture and drying documentation
- Communication log with dates and approvals
Why This Improves Outcomes
Adjusters process high claim volumes. Organized files reduce back-and-forth, help identify covered scope faster, and lower the chance of missing supplemental opportunities when hidden damage appears during dry-out or reconstruction.
Supplemental Claim Scenarios Homeowners Miss
Even well-documented claims can evolve. Supplemental updates are common when:
- Hidden moisture is discovered after initial tear-out
- Additional rooms show delayed signs of impact
- Material matching requirements increase repair scope
The key is to document each new finding clearly and quickly.
How to Organize Your Claim File
Create one folder structure with:
- Timeline notes
- Photo/video evidence by room and date
- Mitigation logs and readings
- Invoices/receipts
- Email summaries and approvals
A clean file helps both your adjuster and your restoration team work faster.
Communication Template You Can Reuse
For every major update, send a short written summary:
- What was found
- Why scope changed (if it changed)
- What actions were completed
- What happens next
- What approval is needed
This reduces miscommunication and protects decision history.
Closeout Checklist Before Final Claim Signoff
- All affected rooms documented
- Source repair confirmed
- Drying verification complete
- Reconstruction scope agreed
- Final invoices aligned with approved work
Closing with complete records helps prevent post-close disputes.
Why Homeowners Lose Time During Claims
Most delays come from missing or inconsistent information, not from one major mistake. If documentation, scope notes, and communication logs are aligned from day one, claims usually move more smoothly.
Claim Review Meeting Checklist
Before your final adjuster/review call, prepare:
- chronological event timeline,
- complete photo set by room and date,
- mitigation/drying records,
- source repair confirmation,
- reconstruction scope summary.
This reduces follow-up requests and shortens decision cycles.
Keep the Project and Claim in Sync
Whenever scope changes onsite, update your claim file the same day. A synchronized file prevents confusion between what was discovered, what was approved, and what was completed.
Keep Approvals and Work Logs Connected
As work progresses, pair each approval with the matching field update in your project log. This creates a clean audit trail and helps everyone—homeowner, adjuster, and contractor—stay aligned on what was authorized, completed, and billed.